While I primarily used ChatGPT for day-to-day personal tasks, I switched between ChatGPT, Gemini, Grok, and Claude and all of them are pushing $20+ per month (minimum) subscriptions on users to access their basic models. If my family wants to use them, those are separate subscriptions for each person. Add in the fact that I also pay for API usage for anything I do with my various development/coding projects, my family's AI bill is easily $200/month or more.
I'm canceling my AI subscriptions and launching an Open WebUI instance instead. Obviously, this won't impact my existing API usage costs but it will allow consolidation of several individual monthly subscriptions to ChatGPT and Gemini.
Open WebUI is a self-hosted web interface for working with various LLMs. In practice, it gives you a ChatGPT-style experience that is very controllable, with support for multiple model providers, user accounts, file uploads, knowledge bases, web search, and extensibility through tools and integrations.
What makes it especially useful is that it sits between you and the underlying model APIs. Instead of using a separate app for OpenAI, Anthropic, Google, or other providers, you can connect your own API keys (including self-hosted) to one interface and choose the right model for the task. That makes it a much more flexible foundation than a single locked-in AI product, especially if you want privacy, shared household access, or room to grow into more advanced workflows over time.
I'll be running Open WebUI on an AWS EC2 (Lightsail) instance with Cloudflare One (AKA Zero Trust) for only $12 a month. Assuming I just cancel my own ChatGPT + Gemini subscriptions, this would pay for itself every month but knowning I can share with my entire family (and everyone maintains their own private account) is a bonus. Our aggregate token usage for day-to-day normal use is like well below $20/month for everyone combined. Beyond the cost, we'll also benefit from the ability to access many more models (currently 150+, including paywalled premium models), a private interface my family can use together, file uploads and knowledge bases, and the ability to grow into tools, search, and RAG without rebuilding everything later.
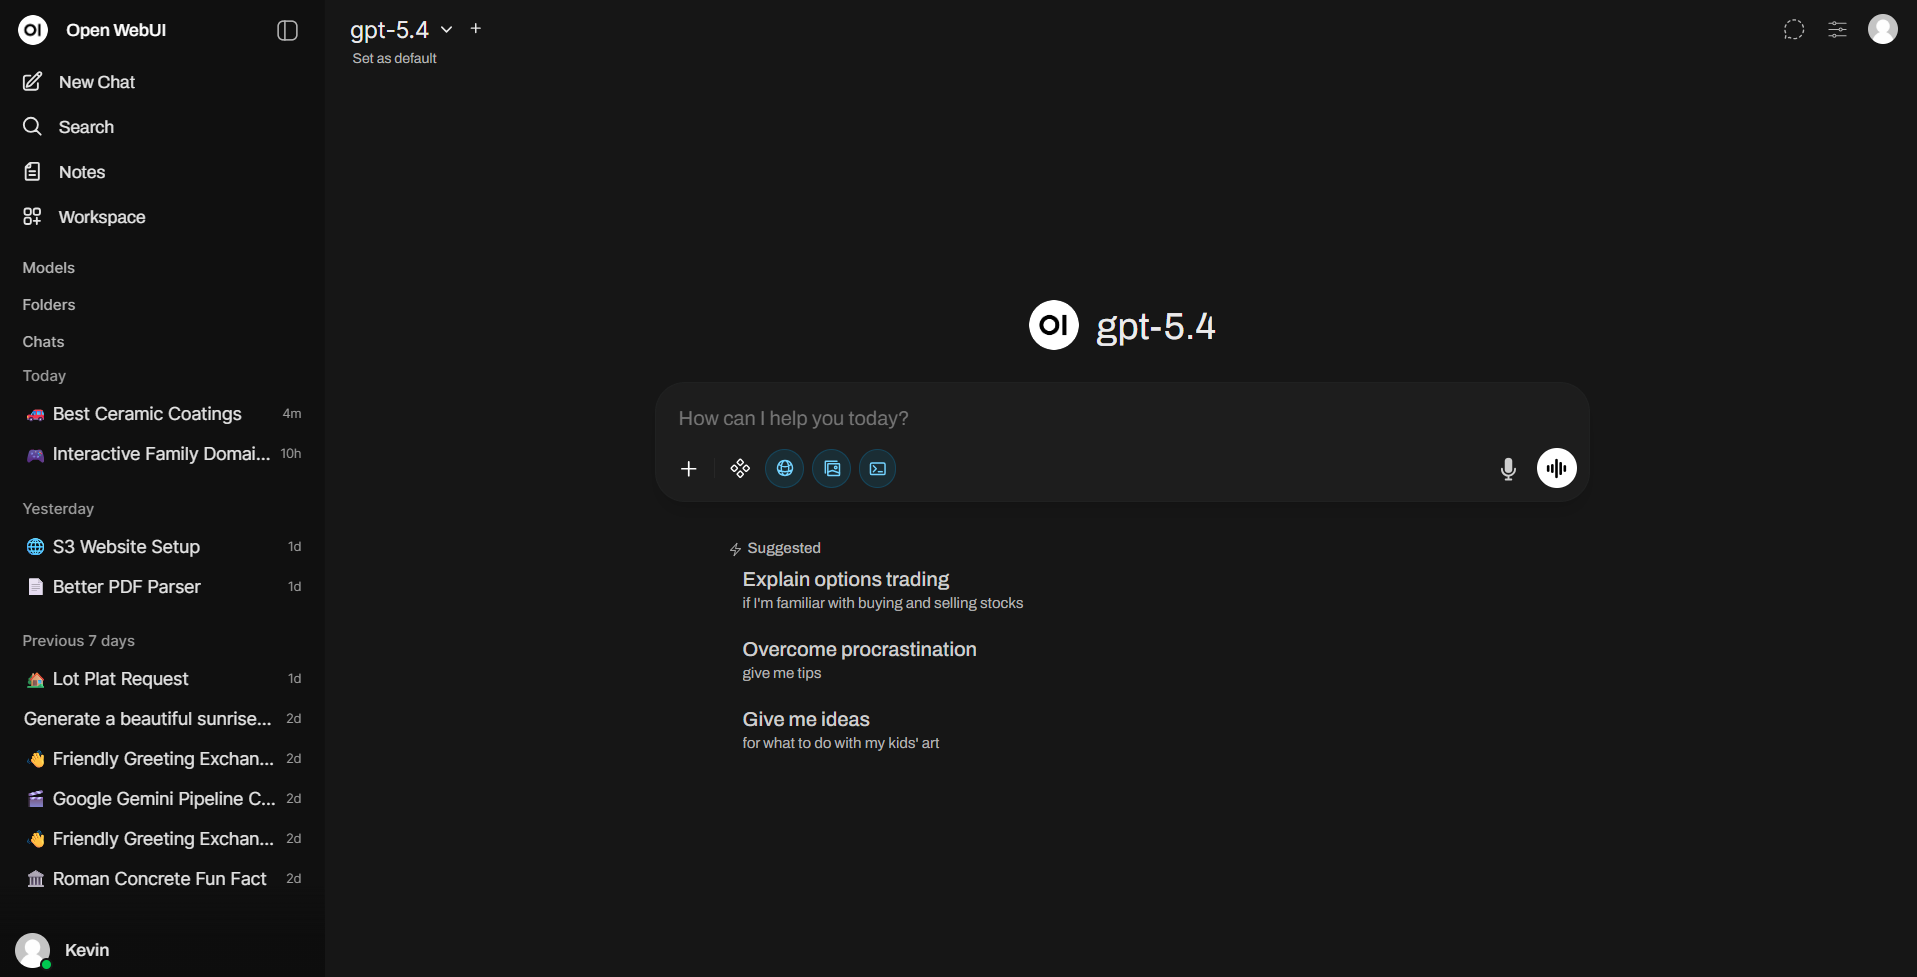
The user experience feels very similar to ChatGPT/Gemini/Claude/Grok that everyone is already familiar with.
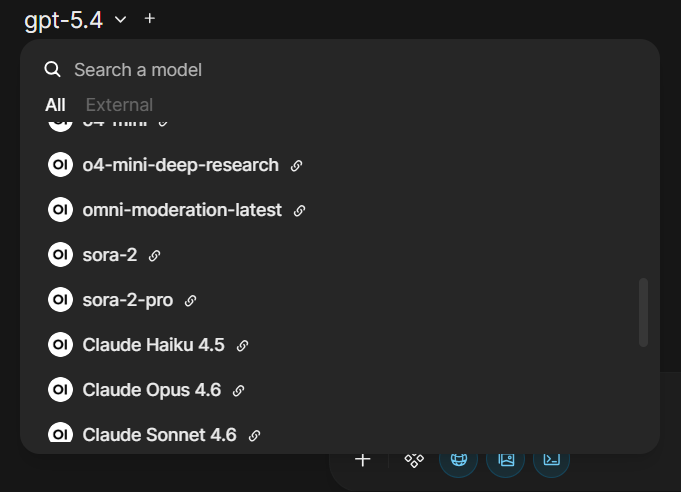
But the user can easily switch between models or create custom models and knowledge bases, all within a click or two.
This simple setup feels surprisingly capable for how little infrastructure it requires:
- Open WebUI for the application layer
- AWS EC2/Lightsail for cheap, persistent hosting
- Cloudflare Tunnel for secure routing
- Cloudflare Access for email-based authentication
- S3 for file storage behind the scenes
- Optional Google Drive import for convenience
I opted to use Cloudflare Tunnel+Access as I already have a domain setup for my NAS that allows for photo/file/media sharing with family & friends. This isn't needed but, as I intend to share my Open WebUI instance with the same people, I opted to use the same implementation approach. If you want to take this approach as well, this post walks through exactly how to replicate my setup end-to-end. For me, that separation matters. Cloudflare controls who can reach the app. Open WebUI controls what they can do once they’re inside. Overall, this approach feels a lot more flexible than a single hosted AI app, but without turning your weekend into an infrastructure project.
The architecture
At a high level, the system looks like this:
Browser
  -> Cloudflare Access
  -> Cloudflare Tunnel
  -> Lightsail instance
  -> Open WebUI Docker container
  -> Model providers / S3 / optional integrations
The app itself listens only on localhost. Cloudflare handles the public edge keeping the Lightsail origin from being directly exposed. For added peace of mind, I limit the instance firewall to just the Cloudflare IP ranges like outlined here.
Step 1: Launch the Lightsail instance
I'm running Ubuntu 24.04 LTS with 2GB memory, 2 vCPUs, 60GB SSD Storage, and 3TB data transfer. This is more than sufficient for my Open WebUI implementation as very little actually happens on the machine and I'm not running any models locally. This instance is $12 a month and is free for the first 90 days as part of the standard Lightsail free tier. Again, this instance size is enough if Open WebUI is mostly acting as a UI layer for external model APIs rather than running local models. I would not use this size for Ollama or heavy local inference, but it is fine for a hosted interface with external providers.
After launching, connect over SSH and get everything up to date:
sudo apt update && sudo apt upgrade -y
sudo reboot
Once you reconnect, install Docker and the compose plugin.
sudo apt update
sudo apt install -y ca-certificates curl gnupg lsb-release apt-transport-https software-properties-common
sudo install -m 0755 -d /etc/apt/keyrings
curl -fsSL https://download.docker.com/linux/ubuntu/gpg | sudo gpg --dearmor -o /etc/apt/keyrings/docker.gpg
echo "deb [arch=$(dpkg --print-architecture) signed-by=/etc/apt/keyrings/docker.gpg] https://download.docker.com/linux/ubuntu $(. /etc/os-release && echo "$VERSION_CODENAME") stable" | sudo tee /etc/apt/sources.list.d/docker.list > /dev/null
sudo apt update
sudo apt install -y docker-ce docker-ce-cli containerd.io docker-buildx-plugin docker-compose-plugin
sudo systemctl enable docker
sudo systemctl start docker
sudo usermod -aG docker $USER
newgrp docker
Step 2: Create the Open WebUI project directory
mkdir -p ~/openwebui
cd ~/openwebui
Generate a secret key and note it: (you can use whatever but this is handy and easy)
openssl rand -hex 32
That secret should stay stable for the life of the deployment.
Step 3: Create your Docker Compose file
Create docker-compose.yml:
nano docker-compose.ymlAnd roughly, here's the compose file I used:
services:
  open-webui:
    image: ghcr.io/open-webui/open-webui:main
    container_name: open-webui
    restart: always
    ports:
      - "127.0.0.1:3000:8080"
    environment:
      WEBUI_URL: "${WEBUI_URL}"
      WEBUI_SECRET_KEY: "${WEBUI_SECRET_KEY}"
      WEBUI_ADMIN_EMAIL: "${WEBUI_ADMIN_EMAIL}"
      WEBUI_ADMIN_PASSWORD: "${WEBUI_ADMIN_PASSWORD}"
      WEBUI_ADMIN_NAME: "${WEBUI_ADMIN_NAME}"

      STORAGE_PROVIDER: "${STORAGE_PROVIDER}"
      S3_ACCESS_KEY_ID: "${S3_ACCESS_KEY_ID}"
      S3_SECRET_ACCESS_KEY: "${S3_SECRET_ACCESS_KEY}"
      S3_BUCKET_NAME: "${S3_BUCKET_NAME}"
      S3_REGION_NAME: "${S3_REGION_NAME}"
      S3_ENDPOINT_URL: "${S3_ENDPOINT_URL}"
      S3_KEY_PREFIX: "${S3_KEY_PREFIX}"
      S3_ENABLE_TAGGING: "${S3_ENABLE_TAGGING}"

      SMTP_HOST: "${SMTP_HOST}"
      SMTP_PORT: "${SMTP_PORT}"
      SMTP_USER: "${SMTP_USER}"
      SMTP_PASSWORD: "${SMTP_PASSWORD}"
      SMTP_FROM: "${SMTP_FROM}"
    volumes:
      - open-webui:/app/backend/data

volumes:
  open-webui:
Then create a .env file next to it:
WEBUI_URL=https://yourdomain.com
WEBUI_SECRET_KEY=replace_with_your_generated_secret
[email protected]
WEBUI_ADMIN_PASSWORD=replace_with_a_strong_password
WEBUI_ADMIN_NAME=Your Name

STORAGE_PROVIDER=s3
S3_ACCESS_KEY_ID=replace_with_your_s3_access_key
S3_SECRET_ACCESS_KEY=replace_with_your_s3_secret
S3_BUCKET_NAME=your-openwebui-bucket
S3_REGION_NAME=us-west-2
S3_ENDPOINT_URL=https://s3.us-west-2.amazonaws.com
S3_KEY_PREFIX=openwebui/
S3_ENABLE_TAGGING=true

SMTP_HOST=email-smtp.us-west-2.amazonaws.com
SMTP_PORT=587
SMTP_USER=replace_with_your_ses_smtp_username
SMTP_PASSWORD=replace_with_your_ses_smtp_password
[email protected]
Lock down the .env file:
chmod 600 .env
Then start the app:
docker compose up -d
docker compose logs -f
Step 4: Configure S3 as the storage backend
This is optional but I suggest doing so as this will keep all your files safe if you ever destroyed your instance. If you don't want to do this, delete the S3 lines from docker-compose.yml. In Open WebUI, knowledge bases live in the application, not in S3. S3 is just the file storage backend. You still (always) upload files through Open WebUI. Open WebUI then stores the file in S3 and indexes it for retrieval. If you don't use S3, it'll simply use the local machine.
A narrow IAM policy is enough. The app mainly needs bucket listing and object read/write/delete for that one bucket.
Step 5: Configure SES SMTP if you want app email
This step is also optional. If you don't want to do this, delete the SMTP lines from docker-compose.yml. Cloudflare Access already handles the outer authentication layer, so Open WebUI does not need to send email for basic access control. I still wired SMTP in because I wanted the option for app-driven email workflows later. If you use Amazon SES, use the SMTP interface rather than trying to force a raw SES API integration into Open WebUI. You need SES SMTP credentials, not your normal AWS access keys.
I also tested SMTP connectivity directly from the server before assuming my configuration was correct. That is worth doing.
openssl s_client -crlf -quiet -starttls smtp -connect email-smtp.us-west-2.amazonaws.com:587
If that returns a successful SMTP response, your network path and TLS negotiation are fine. The remaining variables are then usually credentials, sender identity verification, or SES sandbox restrictions.
Step 6: Put Cloudflare Tunnel in front of the app
Technically, this step is also optional but this is the part that makes the setup feel much safer than a quick public VPS deployment. In Cloudflare Zero Trust, go to the tunnels section and create a new tunnel for the Lightsail instance. Cloudflare makes this super simple and gives step-by-step instructions in their UI. Just follow them and install cloudflared on the instance and run the service install command Cloudflare gives you. The service mapping should point:
- hostname:
yourdomain.com - service:
http://localhost:3000
That gives you public routing without exposing the app directly on the instance’s public interface. Cloudflare Tunnel is designed around that outbound-only connector pattern.
Step 7: Turn on Cloudflare Access email authentication
If you're new to using Cloudflare Access, this step will likely take 30 minutes or so. For a simple private household setup, One-Time PIN email auth is enough (in my opinion). The main thing to understand is that Cloudflare does not send OTPs to arbitrary email addresses by default. Your Access policies need to allow the users or domains you expect. A clean approach is to allow specific email addresses or an email domain if that fits your use case. I opt to allow only specific email addresses as this is a simple way of whitelisting and managing access. Once Access is attached to the app, the flow becomes:
- user hits yourdomain.com
- Cloudflare Access challenges them by sending a OTP to their email address
- then Open WebUI handles the app login after they are through the front gate
I set my challenge window relatively high (a month) so that it's not always an annoyance to access. That Access separation is nice because Cloudflare becomes the outer security perimeter and Open WebUI remains focused on application behavior.
Step 8: Connect model providers
This is, by far, the easiest step. Once the app was up, I added models from the admin panel rather than burying everything in the compose file. Anthropic was easy to add from the provider connections screen, and Open WebUI can also be extended with other providers (e.g. Gemini requires a function to use at the moment). For most, you simply need to go to OpenAI/Anthropic/etc and get an API key. The point here is not just that you can add multiple models, but that you can keep your own keys and swap providers based on task and cost. That flexibility is one of the biggest reasons to self-host this kind of interface in the first place.
Step 9: Turn on knowledge bases and test RAG
With S3 configured, the right way to test the whole stack is simple:
- create a test knowledge base
- upload a file through Open WebUI
- confirm the file lands in S3
- ask a question that only that file can answer
This validates the entire path:
- Open WebUI upload
- S3-backed storage
- document ingestion
- embedding/indexing
- retrieval in chat
Step 10: Improve document parsing
I also switched the PDF parsing configuration to Mistral OCR because I have a ton of PDFs for my knowledgebase and I found the default option to be lacking. For straightforward text-heavy documents, the default was fine. For mixed or image-heavy PDFs, it was basically useless so, again, I opted to just switch to Mistral.
If you change parsers later, the safest way to make sure an existing file is reprocessed under the new parser is usually to remove and re-upload that file. Reindexing may rebuild vectors, but it may not always force a full re-extraction from the raw file depending on how the prior ingestion was stored. It's best to just set your preferred option up front vs having to re-index later (learned the hard way).
The knowledge base structure I recommend
The biggest mistake here is dumping everything into one giant knowledge base. That works at first and then quietly becomes a mess. A better structure is a small number of high-level knowledge bases by domain, such as household, finances, career, individual projects, etc.
Security choices that felt worth it
This setup is flexible but there are some basic non-negotiable security rules to keep even a basic security posture (even for simple personal use) here:
- bind Open WebUI only to localhost
- do not expose port 3000 publicly
- lock down your Lightsail firewall
- keep Cloudflare Access in front
- keep the S3 bucket private
- use least-privilege IAM access
- store secrets in .env, not directly in the compose file
- keep Open WebUI signups disabled once your intended users are created
Final thoughts
This solution ended up hitting a sweet spot for me. It is private enough to feel comfortable, flexible enough to use my own provider keys, simple enough to manage on a small Lightsail instance, and structured enough to grow into something more useful over time. It also leaves room for future additions like tool servers, custom workflows, and richer knowledge retrieval without forcing those decisions up front. Granted, I had much of the Cloudflare config already done for my NAS, but I was still able get all this going in less than 45 minutes.
That is really the value of this setup. It is not just a self-hosted chat UI. It is a simple, quiet foundation for an AI workspace you actually control and can comfortably share with loved ones.
Comments
No comments yet.
Leave a comment